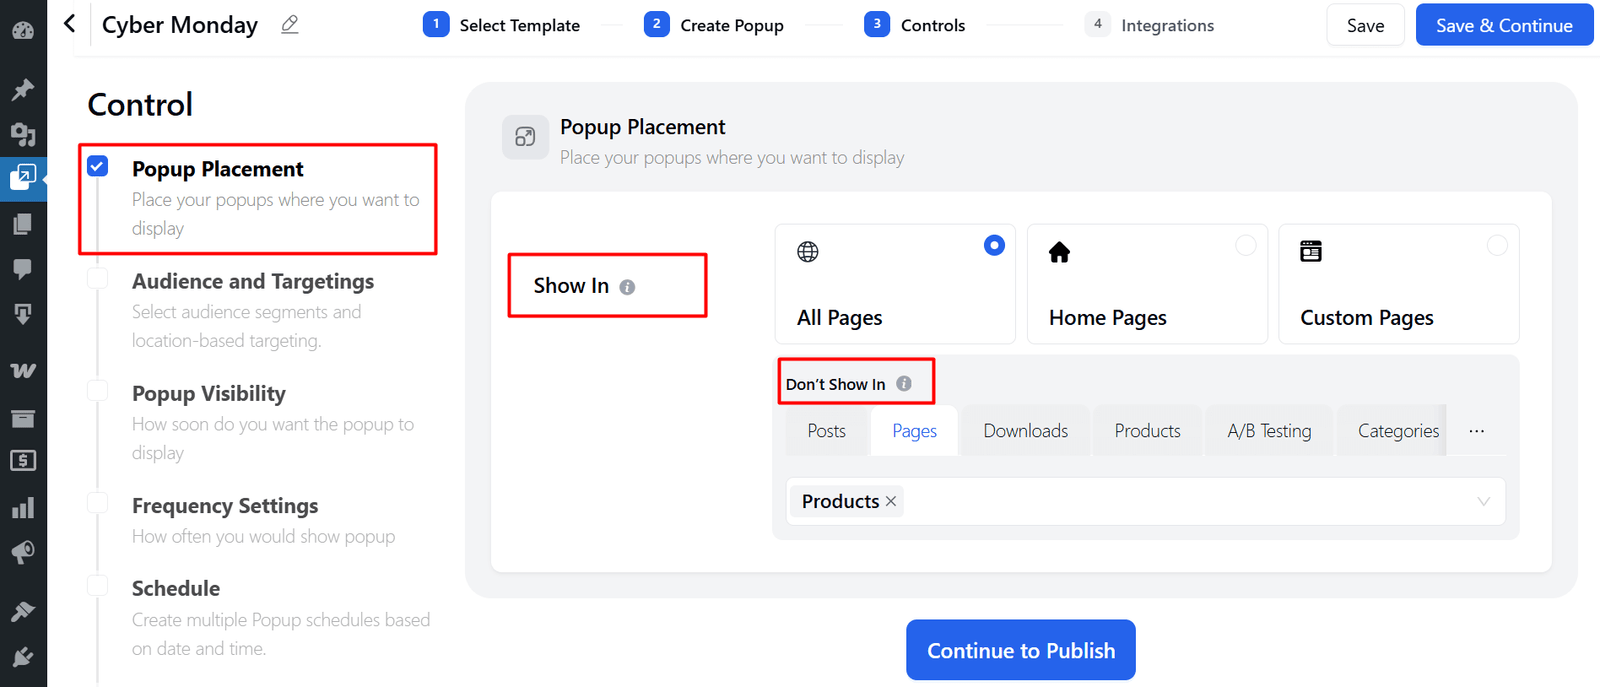
Popup Placement Settings
Popup placement allows you to control exactly where your popup will appear on your website. By configuring these options, you can target specific pages, categories, or URLs for maximum engagement.
Fields and Options
Show In
Decide where the popup should be displayed.
- All Pages – The popup will appear across your entire site.
- Home Page – The popup will only show on the homepage.
- Custom Pages – Choose specific pages where you want the popup to be displayed.
Don’t Show In
Exclude certain areas of your site where the popup should not appear:
- Posts – Prevent the popup from showing on blog posts.
- Pages – Exclude standard WordPress pages from showing popups.
- Downloads – Hide the popup on download pages (e.g., file or digital product downloads).
- Products – Stop the popup from appearing on product pages (useful for WooCommerce or other eCommerce setups).
- A/B Testing – Exclude the popup from certain A/B test variations to keep results clean.
- Categories – Prevent the popup from showing within specific blog or product categories.
- URL – Exclude the popup from particular URLs by entering them manually.
