An auto-response email is an automatic message sent to users when they interact with your campaign — for example, filling out a form or subscribing to a newsletter. This helps you quickly acknowledge their action, share useful information, or thank them, without any manual effort.
Follow the steps below to set up an auto-response email in Poptics:
1. Create a Campaign
Start by creating a new campaign in Poptics. The auto-response email will be linked to this campaign.
2. Go to Control Settings
Once your campaign is created, go to the Controls section. Here you’ll find multiple options to customize how your campaign works.
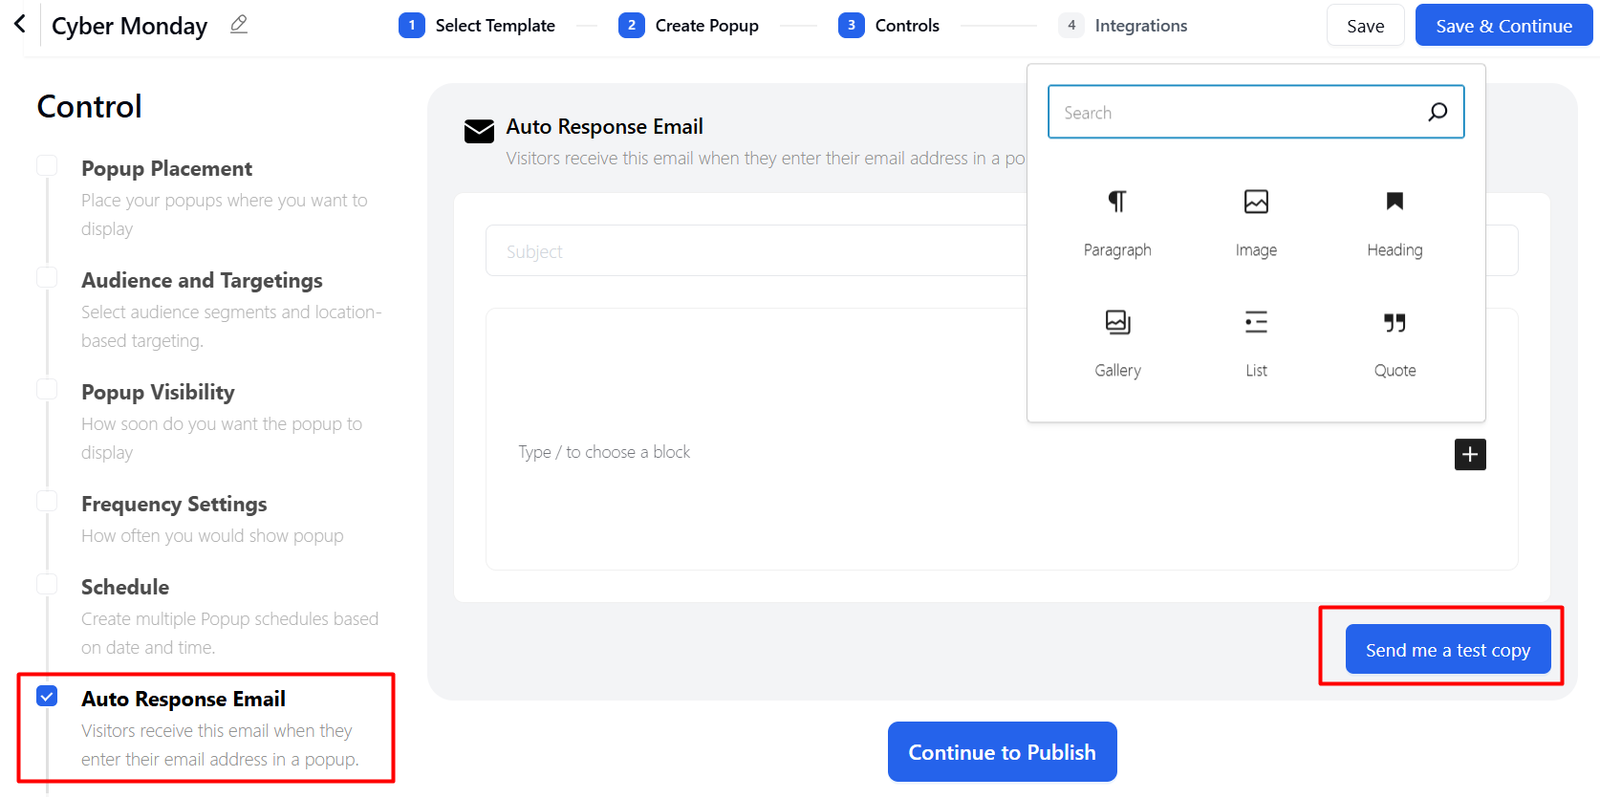
3. Enable Auto-Response Email
In the left panel under Control, check the option Auto Response Email.
This ensures that an email will automatically be sent to visitors when they submit their email address in your popup.
4. Customize Your Email
- Subject: Enter the subject line of the auto-response email.
- Body: Use the editor to add text, images, headings, lists, or quotes. You can also personalize the message with tokens such as the user’s name or email.
- Test Copy: Click Send me a test copy to preview how the email looks before publishing.
5. Save and Publish
- Click Save & Continue once you’re happy with the setup.
- Finally, select Continue to Publish to activate your campaign.
- Now, whenever a visitor engages with your popup, they will instantly receive your auto-response email.
6. View Submission Data
All visitor submissions can be found under Poptics → Submissions in your WordPress dashboard. Here, you can view, filter, and manage the collected data according to your needs.
