A campaign in Poptics allows you to effectively engage your audience through interactive popups and notifications. Whether your goal is to promote special offers, capture leads, reduce cart abandonment, or boost overall conversions, Poptics provides a streamlined process to set up campaigns quickly and efficiently.
Creating a campaign involves four key steps:
By following these steps, you can launch highly effective campaigns that engage users, drive conversions, and support your marketing objectives.
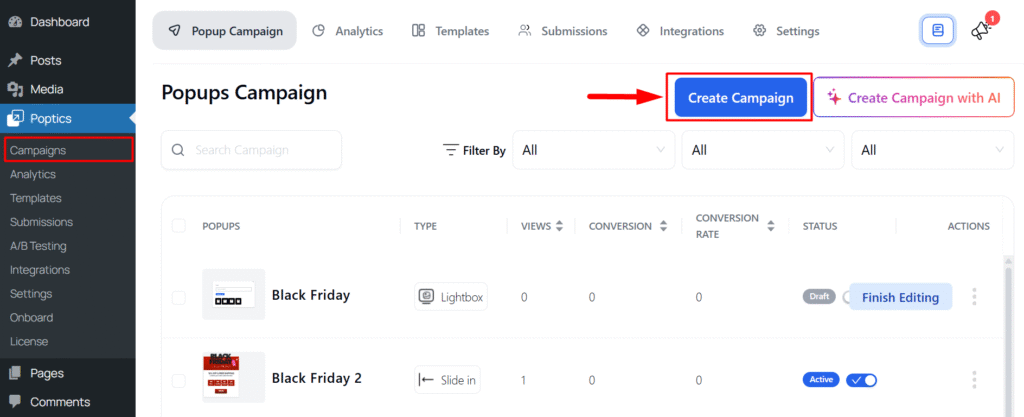
To create a Campaign, go to Poptics -> Campaign -> click on the button “Create Campaign “. It will redirect you to the Template Menu. Here, you have to select a template to customize your campaign.
How to Create a Popup Form
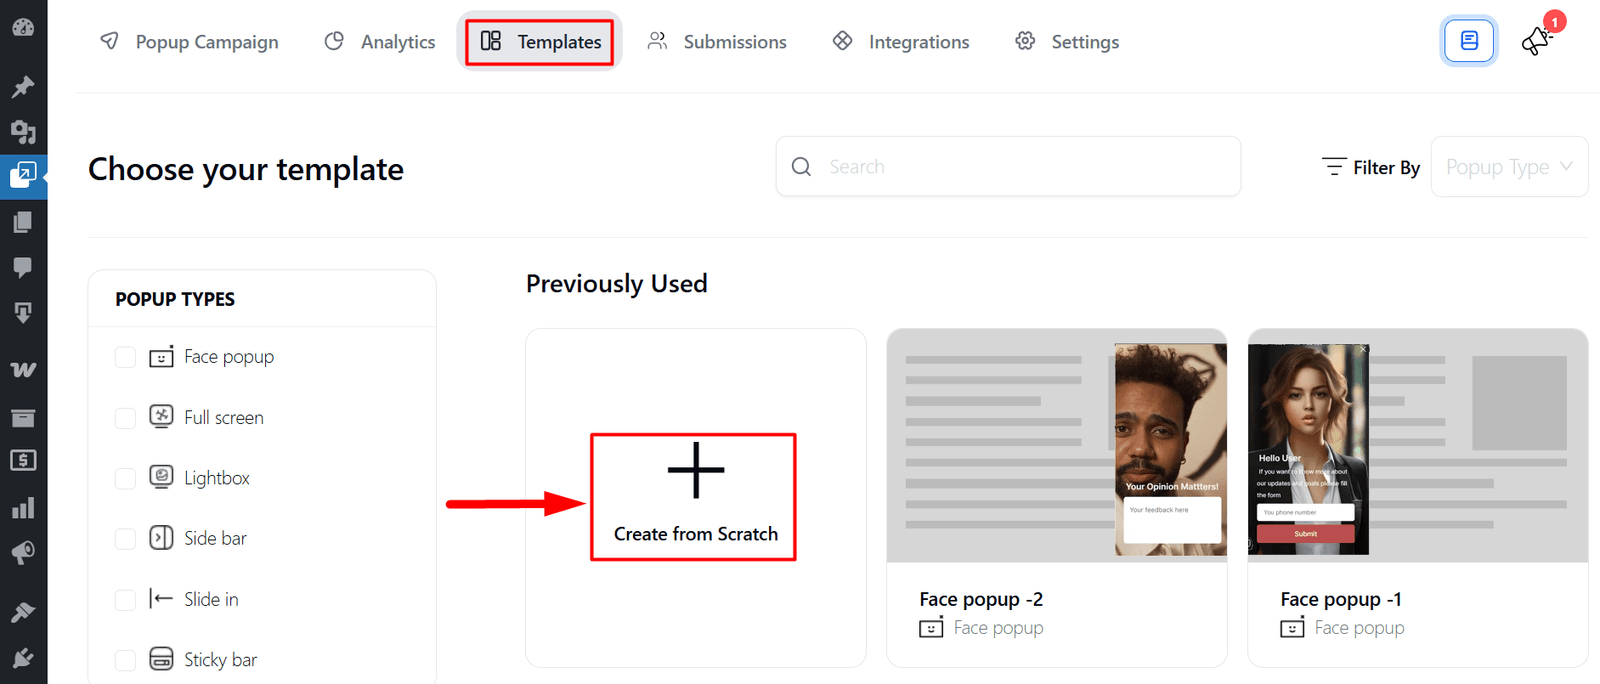
There are 2 ways to customize your campaign form:
- Select a demo template and customize it.
- Or create a campaign totally from scratch based on your needs.
Customize Popup from Scratch
Click on “Create from Scratch” and a form will open. Here you have to set up the following:
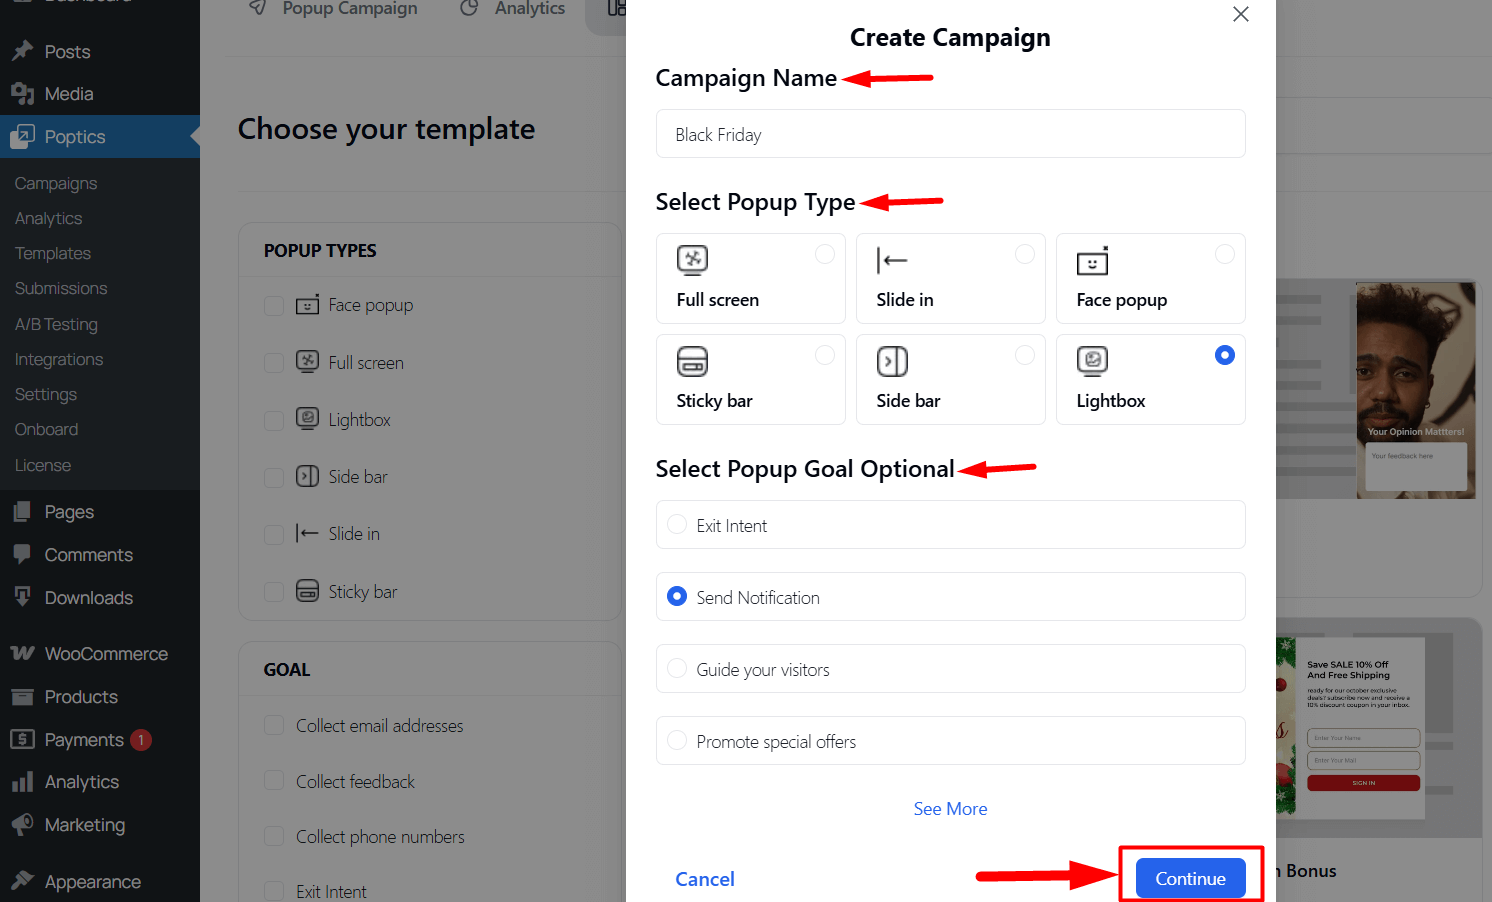
1. Campaign Name: Give your campaign a name for easy identification.
2. Select Popup Type: Choose how you want your popup to appear on the website. Available types are:
- Full Screen – Displays a popup that covers the entire screen.
- Slide In – A popup that slides in from the side or bottom of the page.
- Face Popup – A small, attention-grabbing popup with an image or message.
- Sticky Bar – A bar that stays fixed at the top or bottom of the page.
- Side Bar – A vertical popup that appears on the left or right side.
- Lightbox – A centered popup that overlays the page content.
3. Select Popup Goal (Optional): Define the goal of your popup from the available options, such as:
- Exit Intent, Send Notification, Guide Visitors, Promote Special Offers, Recommend Products, Stop Cart Abandonment, Make Announcement, Increase Social Engagement, Collect Phone Numbers, Collect Feedback, Collect Email Addresses
After filling in all the required information, click on the Continue button to move to the Form Builder page.
Form Builder page
In this section, you can search for the Poptics Block and select the one you want to use for your campaign. If needed, you can also use the default Gutenberg blocks for additional customization.
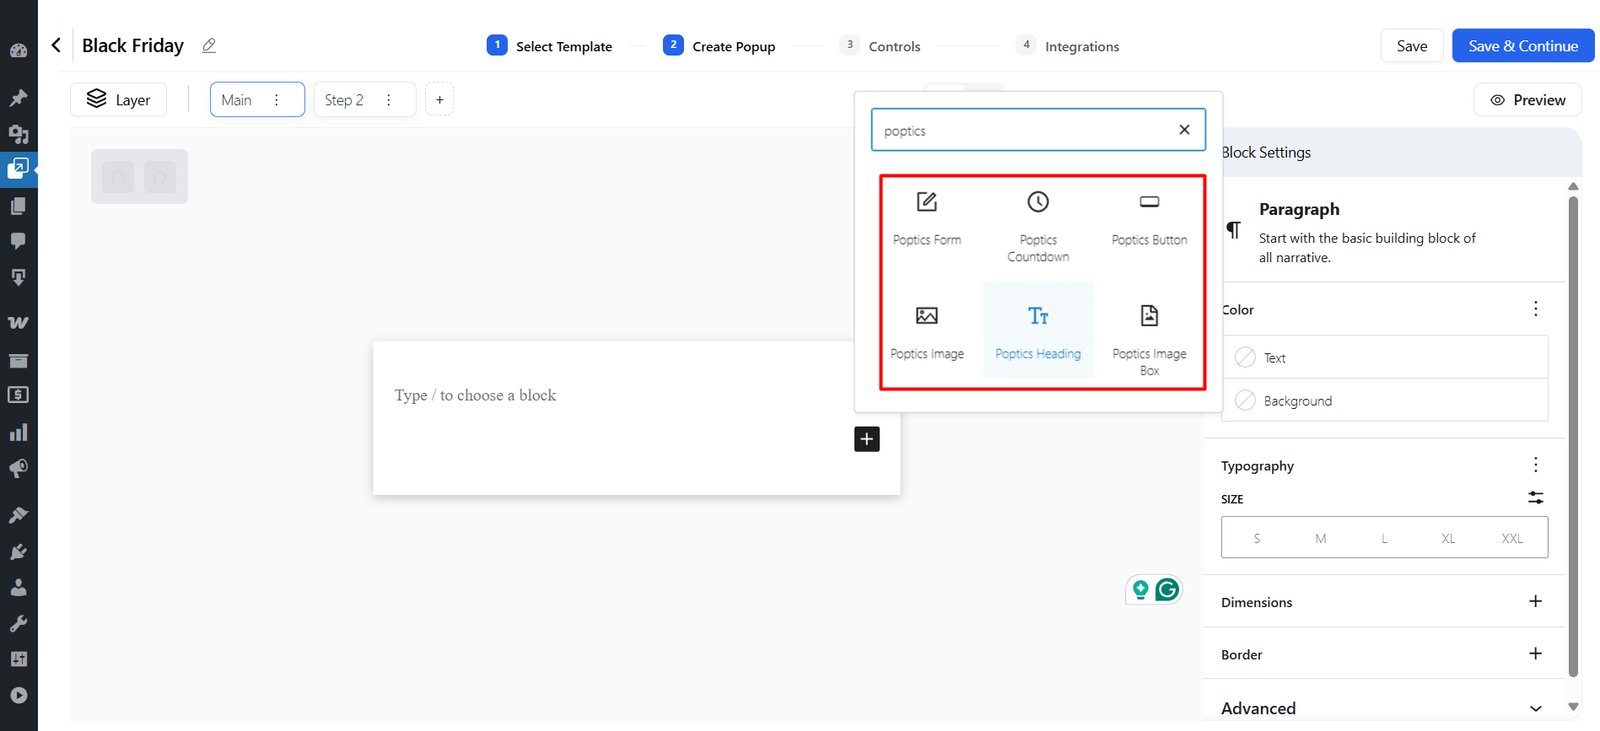
Once you add a block, a settings panel will appear on the right sidebar. This panel generally contains three main tabs: Content, Style, and Advanced. Each tab provides different customization options to design and adjust your campaign form. The available options will depend on which block you have selected.
You can check the documentation for detailed guidance
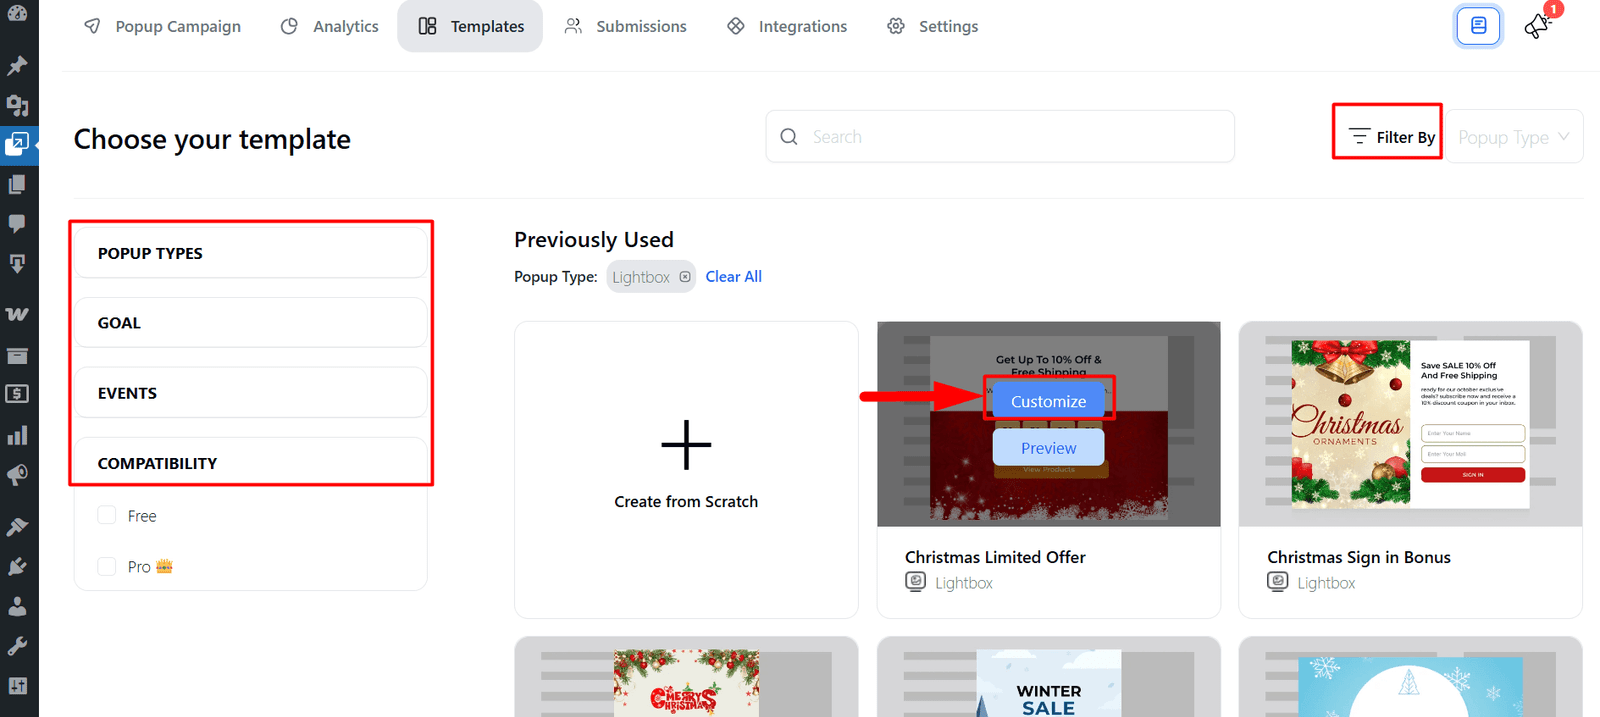
Customize Popup Using Demo Template
If you want to customize a demo popup, you first need to select a template. Once you choose a template, you can filter it based on Popup Type, Goal, Events, and Compatibility using the sidebar options.
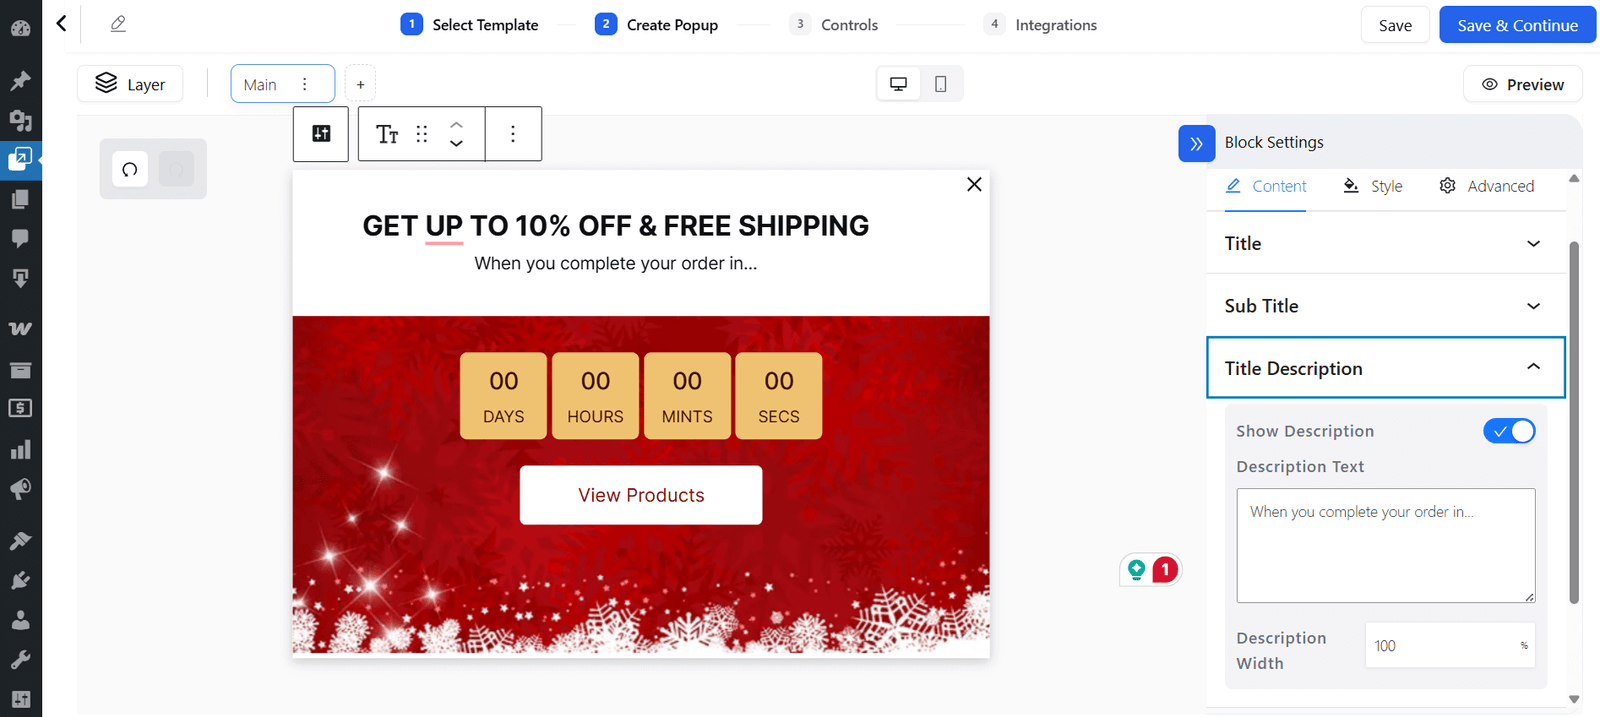
After selecting a template, it will open in the Popup Builder page, where you can fully customize the popup according to your needs. From here, you can adjust content, design, triggers, and behavior to create a fully tailored campaign that aligns with your marketing goals.
Add Popup Controls
After completing the settings, click on the Save & Continue button. This will take you to the Controls panel, where you can configure different options for managing your popup.
- Popup Placement – Decide where the popup appears: on all pages, only the homepage, or specific custom pages. You can also exclude certain posts, pages, products, or categories.
- Audience and Targeting – Choose which audience segment sees the popup, based on location, device type, traffic source, or specific user behavior.
- Popup Visibility – Control when the popup is displayed: instantly, after a delay, on scroll, or on exit intent.
- Frequency Settings – Manage how often the popup shows to the same visitor (once per session, daily, or every visit).
- Schedule – Set start and end dates or specific times for the popup campaign, ideal for limited-time offers, seasonal promotions, or events.
- Auto Response Email – Automatically send an email when a visitor submits their email via the popup, such as a welcome message, confirmation, or discount code.
- E-commerce Conditions – Show or hide popups based on e-commerce rules, like when the cart reaches a specific value or hiding popups on checkout/payment pages.

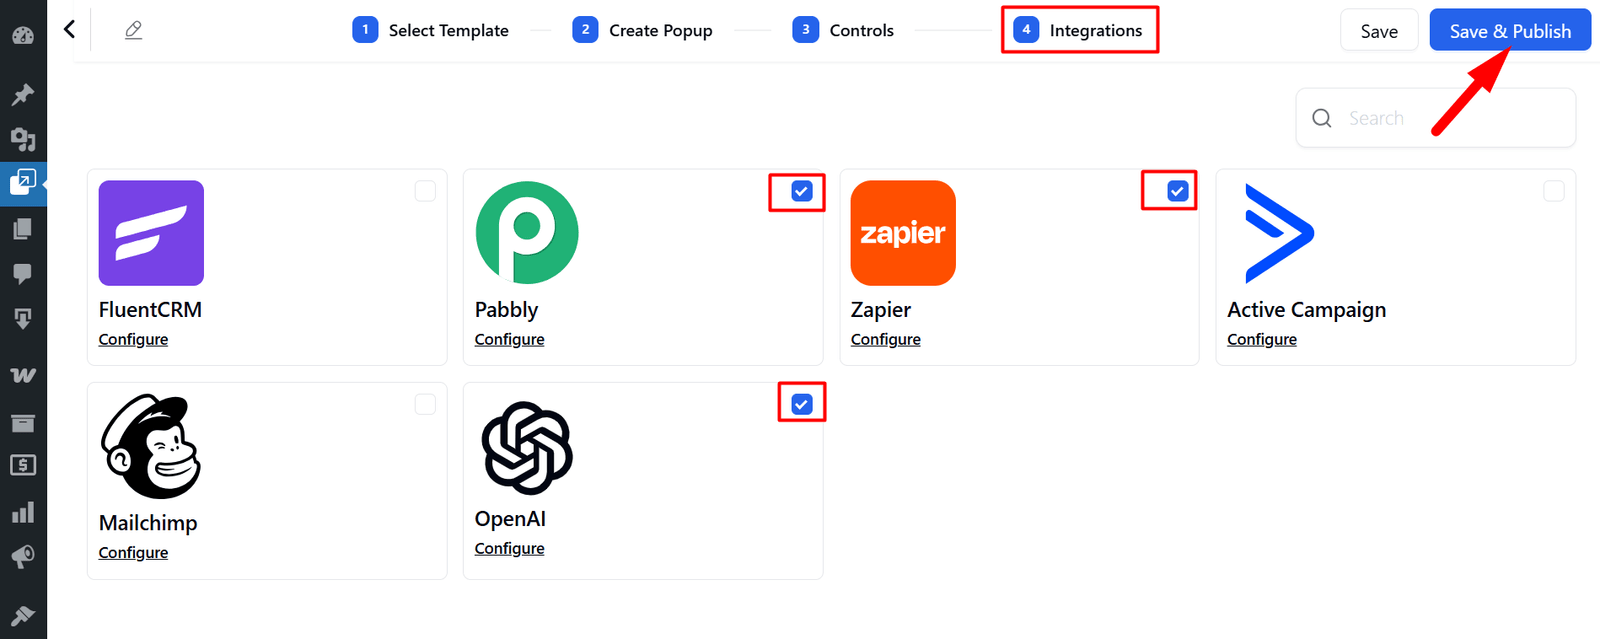
Enable Integrations
Poptics provides powerful integration options to connect your campaigns with popular third-party platforms. You can easily set up integrations by clicking the Configure button beside each service.
Available integrations include:
- FluentCRM – Manage subscribers and run email automation directly within WordPress.
- Pabbly – Connect with hundreds of apps to streamline your workflows.
- Zapier – Automate tasks by linking Exapoptics with thousands of external services.
- ActiveCampaign – Sync contacts and manage advanced marketing automation.
- Mailchimp – Collect leads and run targeted email campaigns seamlessly.
- OpenAI – Enhance campaigns with AI-powered content generation and personalization.
You can also enable multiple integrations simultaneously for a single campaign, allowing maximum flexibility and smooth workflow management.
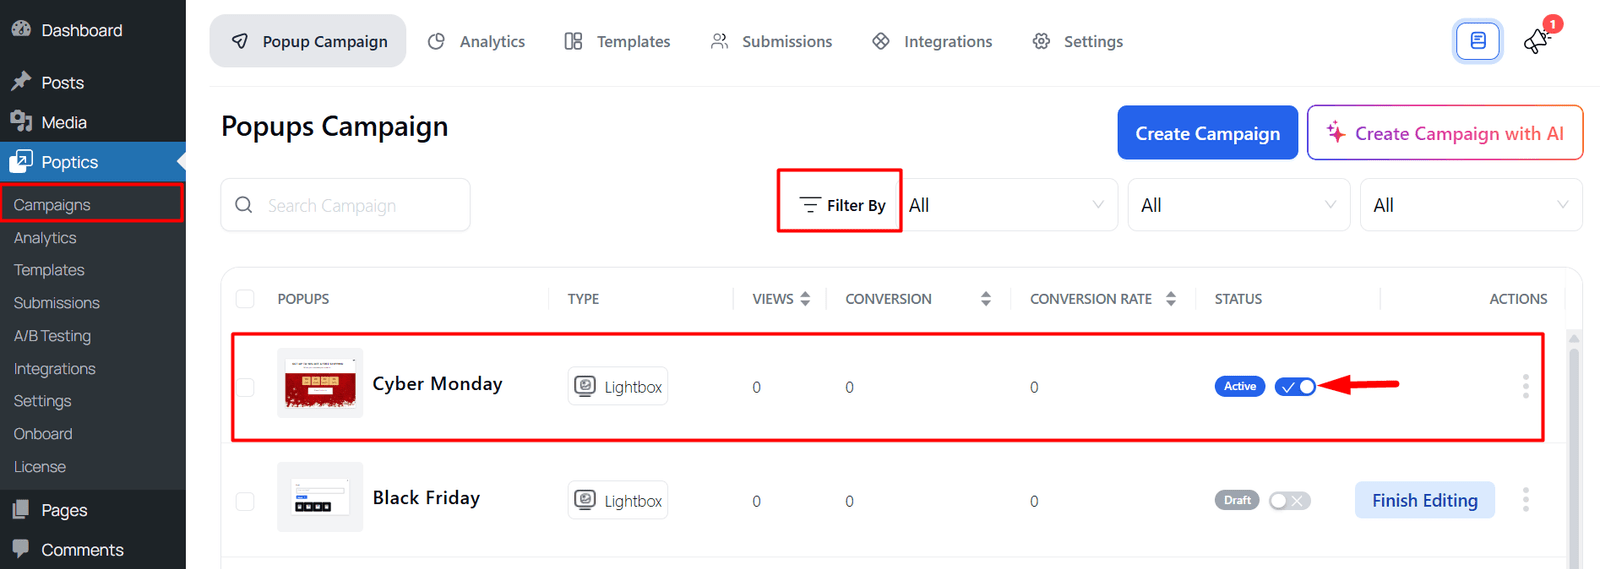
Activate Campaign
After setting up your campaign, click Save & Publish. Your campaign will appear in the Campaign List, where you can activate, pause, or deactivate it.
The Campaign List also includes a filter option, allowing you to easily sort campaigns by their status. Each status displays the total number of campaigns within it.
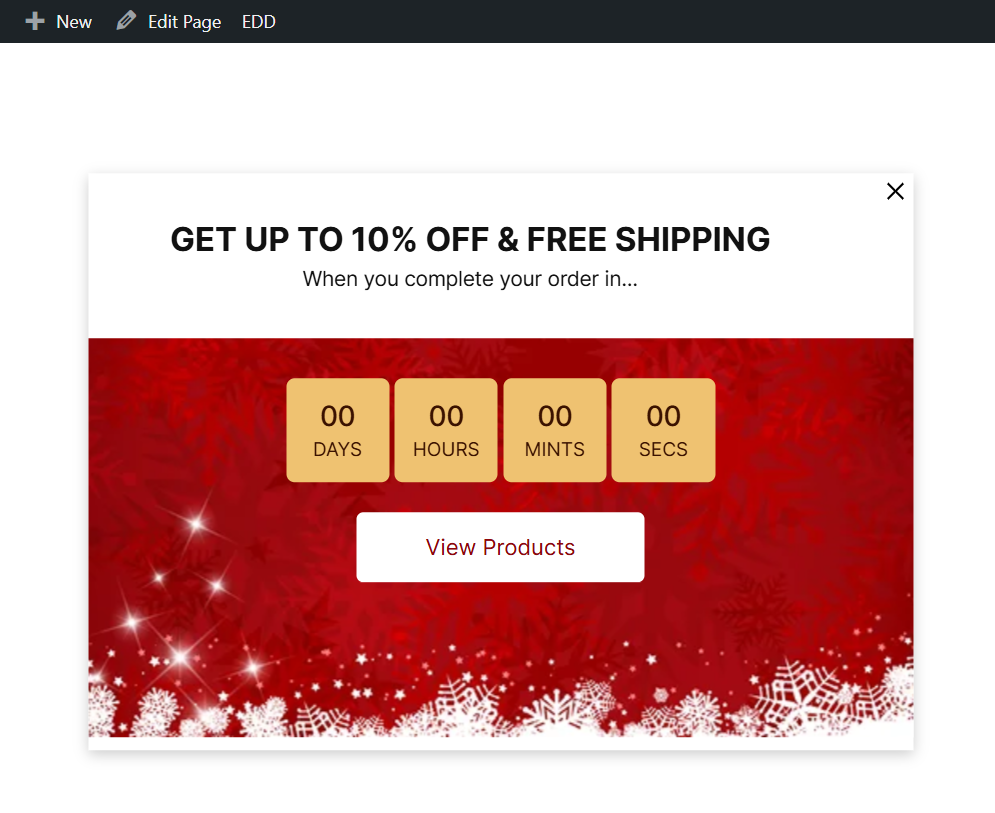
Front-end view
FAQs
- Can I create a popup from scratch?
Yes, click Create from Scratch and customize all settings. - What popup types are available?
Full Screen, Slide In, Face Popup, Sticky Bar, Side Bar, and Lightbox. - Can I target specific users?
Yes, based on location, device, traffic source, or behavior. - Can I integrate multiple tools in one campaign?
Yes, you can enable several integrations simultaneously.
Conclusion
Poptics campaigns let you quickly create interactive popups tailored to your marketing goals. With flexible customization, precise targeting, and powerful integrations, you can boost engagement, increase conversions, and streamline your workflow.