Webhooks facilitate communication between Poptics and third-party websites or external APIs that are compatible. By using webhooks, you can transmit popup submission data to an external URL and share details about popup submissions when they are created, updated, or deleted.
Note: To enable the webhook feature, both the Poptics Free and Poptics Pro plugins must be activated.
Add a New Webhook
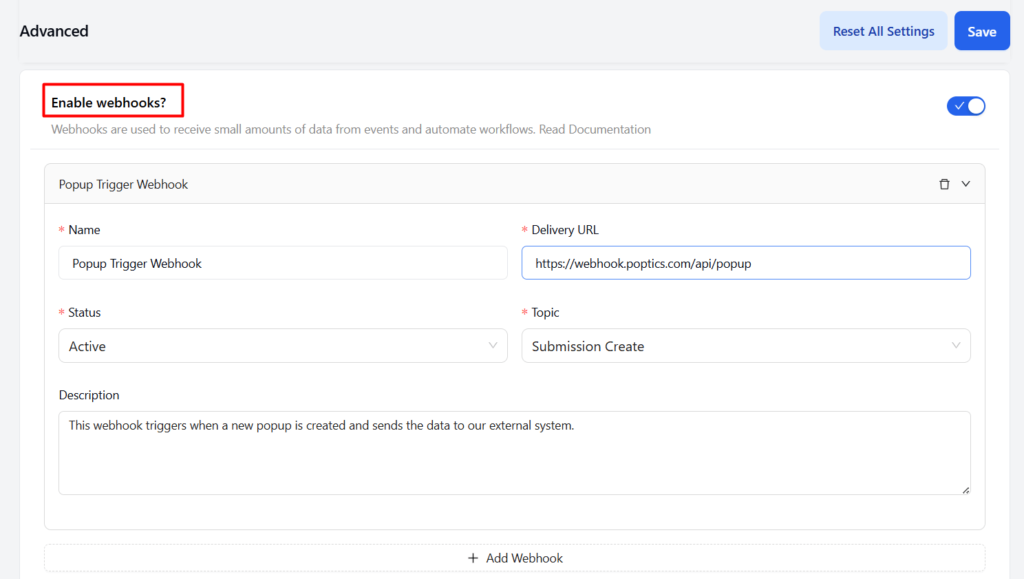
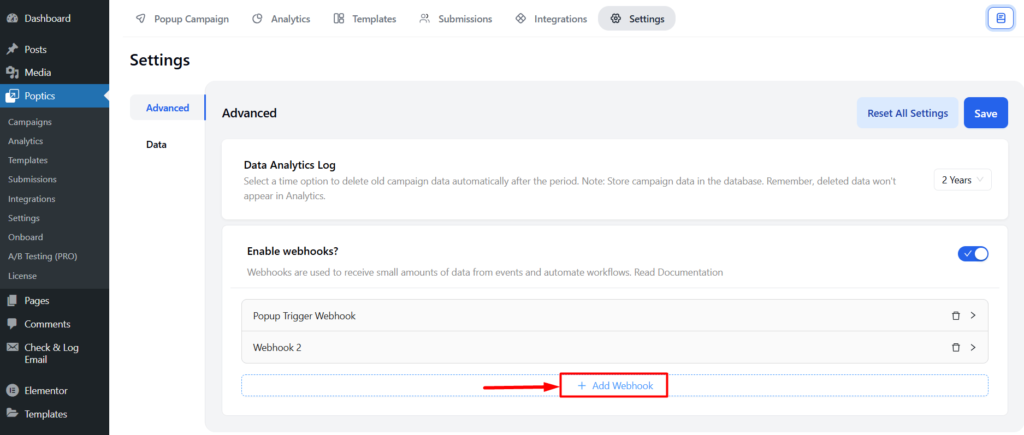
First, ensure that both the Poptics Free and Poptics Pro plugins are activated. Next, go to Poptics → Settings → Advanced and enable the Webhooks option. To add a new webhook, click on the Add New button, and a form will appear for you to fill out the webhook details.

Here is an overview of the fields you need to fill in:
- Name: Enter a title for your webhook.
- Status: You have three status options:
- Active: Choose this to deliver the payload.
- Pending: Select this if you don’t want to deliver the payload immediately.
- Disable: Choose this if you do not wish to deliver the payload.
- Topic: Select the appropriate topic for the webhook trigger (e.g., when a popup is created, updated, or deleted).
- Delivery URL: Enter the API endpoint that accepts the POST request. This is where your webhook will deliver the payload.
- Secret: Provide the secret key for your webhook, if applicable.
- Description: Add a brief description explaining the purpose of the webhook.

If you need to add multiple webhooks, simply click on the Add Another Webhook button and follow the same process for each one.

How Webhooks Work
Once the webhook is configured, notifications with data will be sent to the delivery URL you specified, depending on the selected topic action, such as when a popup is created, updated, or deleted.